
The Xbox One console stands apart from other gaming machines and for good reason. The high power of the machine combined with the broad array of games available for it makes it the preferred choice for gamers everywhere. Gamers love Xbox One mods for both their games and their consoles, allowing them to enjoy a fully customized gaming experience. Here is how you can chrome your Xbox to give it a sense of power and speed.
Taking the case apart
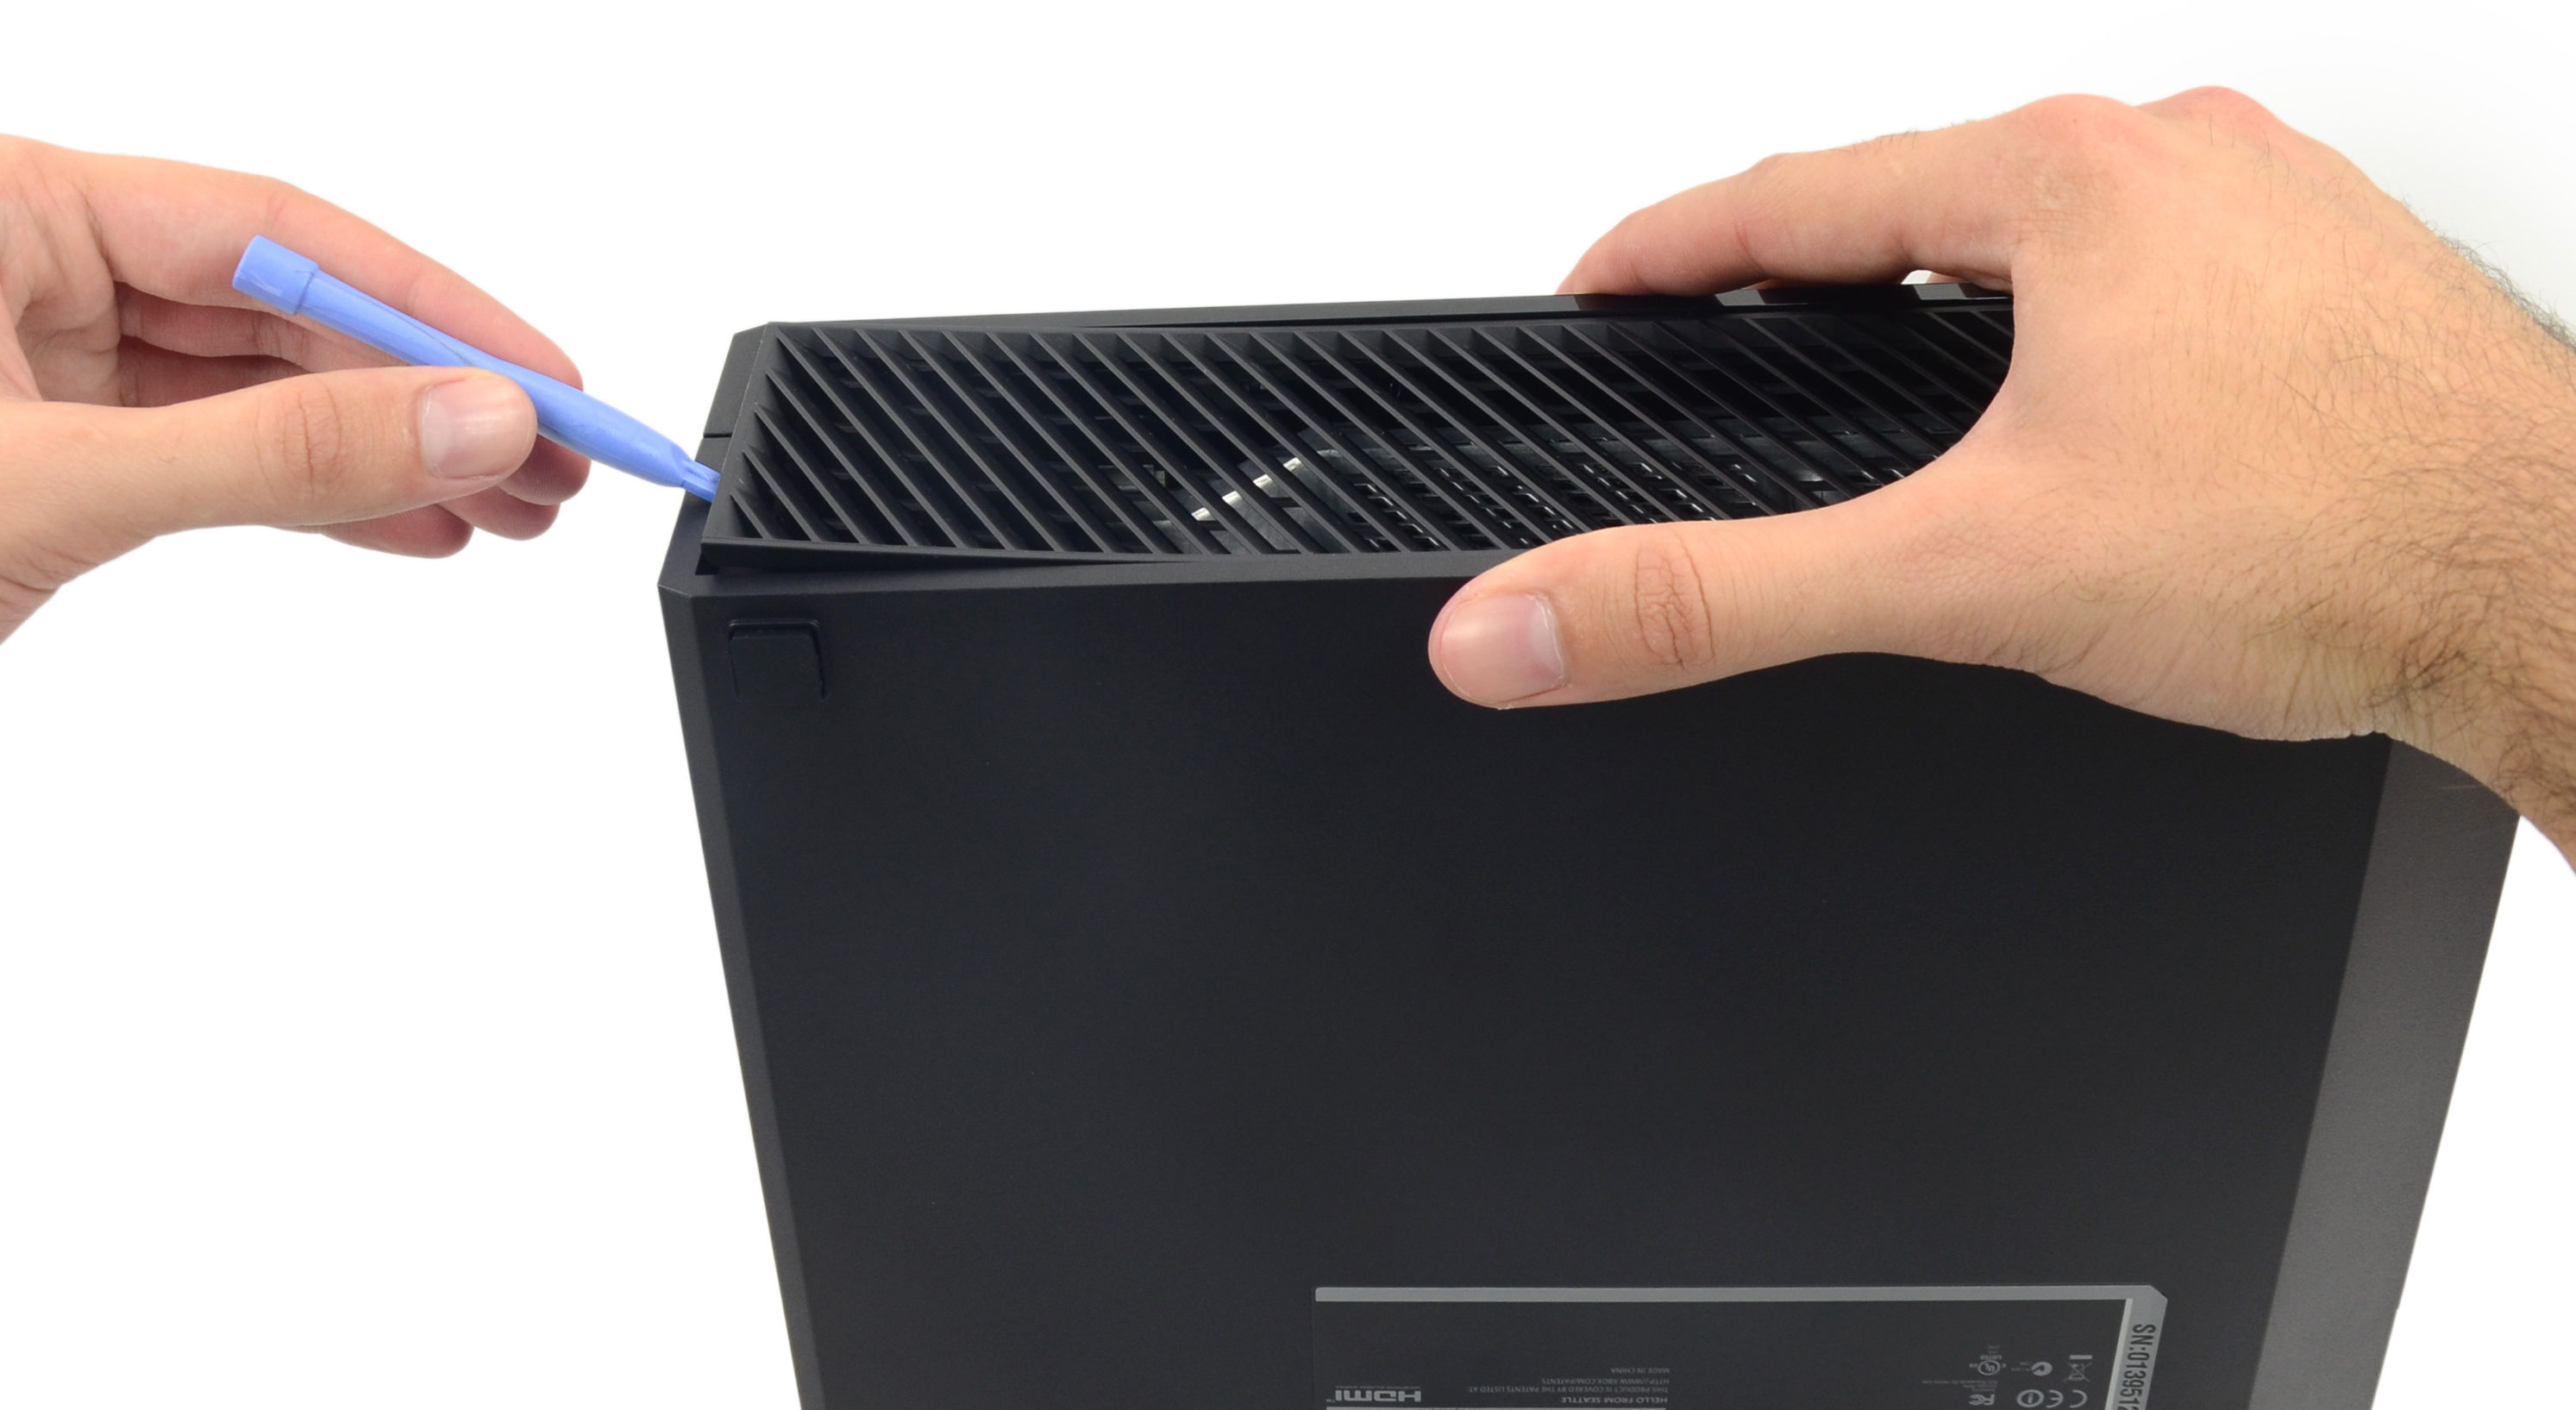
Before your Xbox One modding, you will need to remove the case. You will need to begin by peeling off the tamper-resistant tape that holds the case together. You should understand that doing so will most likely void your warranty. Next, remove the vent from the side of your console using a plastic opening tool. Take care as the plastic clips that hold the vent in place can easily break as they are weak.
On the front corner of your Xbox, you will see a plastic tab. Slide it straight out and take it off. Using the flat side of a spudger, penetrate the opening at the back of the side vent between where the upper and lower case meet. The clip holding the two together will take some force to detach. There are multiple clips around the case that you will also need to remove. While you are working on this, leave the spudger inserted to prevent the clips from pulling the case back shut while you are working on it.
Over the rear vent, use your plastic opening tool to disengage the clip that holds it in place and then continue along the back, removing clips as you go. Continue working until you have released all of the clips. Then, slightly lift up the case so that you can access the panel board, but don’t remove the case completely as it is still attached to the cable that attaches to the board.
Using tweezers, lift away the plastic loop that holds the connector on the front panel board. Then, take your spudger and push the tab on the connector in the direction of the cable. This will unlatch it. Finally, pull the cable out of the connector using your tweezers, and remove the upper case.
How to prepare your Xbox One for modding
Next, you will need to prepare your case for your Xbox One mods. Using 120-grit sandpaper, sand the surface in order to roughen away the smooth factory finish. Using primer, spray the surface with about three coats, allowing the surface to dry thoroughly. Then, sand the surface with at least 120 grit sandpaper to prepare it for chroming.
Applying spray on chrome to your Xbox One
Before you can spray on spray chrome, you will first need to apply your base coat and prepare your solutions. Using your PChrome Artist Starter Kit, take out the solutions bottles that are marked with S, R, D and W. Only use the amount of each solution that you need, reserving the remainder for your next chroming project. In three of the spray bottles that came with your kit, mix together one part of your S, D and R solutions together with 30 parts of deionized water. For your W solution, mix four parts of it together with 30 parts of deionized water in the fourth bottle.
To prepare your base coat, mix together your 2KA basecoat and 2KB hardener in equal amounts, and add 20 percent of the volume in your reducer. Using your paint spray gun, spray your case’s surface using a fine misting spray of the basecoat solution. Avoid touching it with your fingers because fingerprints will show through the finished chrome if you do. Allow it to dry and completely cure, which will take around 24 hours. Make sure to clean your gun using thinner after you spray on your base coat.
After the case surface is cured, spray on your W solution all over. Then, spray your D solution all over the surface using your single-nozzle gun. Rinse it off with deionized water. If the water beads instead of sheeting off the surface, reapply your W solution and your D solution and rinse again.
To spray on spray chrome, feed the S and R solutions into your dual nozzle spray gun. Working your way from the bottom of the case to the top, spray your chrome on the surface using side-to-side movements very fast to apply a thin layer. Go back to the bottom and repeat until you have the brightness you want. As soon as you are done with spraying, blow off any water droplets so they won’t stain the surface. Allow your chrome to completely dry.
You will finish by applying your top coat. Mix the 2KA top coat together with the 2KB hardener and 20 percent clear reducer. Spray this mixture all over the chromed surface and let it dry for 48 hours. At that point, you can apply a second top coat if you want.
Reassembling your Xbox One
After your Xbox mods are completed and dried, you can reassemble your case. With your spudger, release the clips that are holding the front panel to the upper case. Then, line up the top part of the upper case with the perimeter clips and press down to snap them into place. Holding the front panel that you removed near to the front of your console, use the tweezers with your other hand and place the cable back into its ZIF socket in the front button. Then, push the tab to the left using your spudger to secure it. Line up the front panel at a 45-degree angle from the front of your Xbox, seating the plastic hooks with the ones inside of the Xbox. Then, push the top in and snap the front panel back into place.
Now that you’ve completed your Xbox mod project, you can game to your heart’s content. The brilliant chrome will help to speed you along the way. If you want to purchase the Artist Starter Kit today for your own modding project, order yours on our website today. You can also call us if you need technical support.
Order Your Kit Today!
Our kits are perfect to use for Model Kits, Scale Models, Game Consoles, PC Towers and so much more. With PChrome you're only limited by your imagination.
Shop Now